WhatsApp tips and tricks: master messaging
WhatsApp needs no introduction. It's the world's most popular instant messaging service, and we love it. As a show of appreciation for WhatsApp, we've decided to chalk up a list of WhatsApp tips and tricks to help AndroidPIT readers get the most out of it.
To do this, head to Settings > Data usage. In this menu, ensure you untick the boxes in both When using mobile data and When roaming
However, if for any reason you need to move your WhatsApp history over to a new device without using Google Drive, it's still a pretty painless procedure. All you need is a microSD card and a few minutes to spare.
The WhatsApp web client acts as a mirror of your device, meaning you will only receive messages so long as your smartphone is switched on and connected to the internet.
The, on your smartphone browser either head to the WhatsApp website or APK Mirror and download the latest APK (APK Mirror is usually ahead of the WhatsApp website). Once the file's downloaded, open it to install the latest WhatsApp APK.
The second method is more laborious but also better in the long run.
To do this, both the devices you want to use will need to be rooted. Download and install Titanium Backup root and use it to perform a full backup of WhatsApp, including root permissions. Once this is done, use a file manager to navigate to the folder that Titanium Backup created containing the three files starting with com.whatsapp. Copy this folder onto the internal memory of your second device.
Now, on the second device, where you just copied the files to, download and install WhatsApp. Do not open WhatsApp yet. First, download and install Titanium Backup root again. Open Titanium Backup and grant it root permission. Close the warning and select Backup / restore. Restore using the WhatsApp folder that you copied to the device earlier.
Your second device is now set up with a clone of the original app, so it is already verified. The only downside is that only one of the devices will receive notifications, the one from which you sent the last message.
After installing it, you will see a new icon in your browser toolbar. Hover your cursor over it to see the most recently received message, or right click for more options. You'll also notice the WAToolkit options button in your WhatsApp Web tab. The best part? WAToolkit will notify you of messages on your desktop even when Chrome itself isn’t running.
Here's how to have better control over who sees this information on WhatsApp:
Take note that WhatsApp has deliberately made it difficult to tell whether someone has blocked you or not, in order to maintain users' privacy. There's always an outlying chance that you're just being paranoid, even when all four of the below points apply.
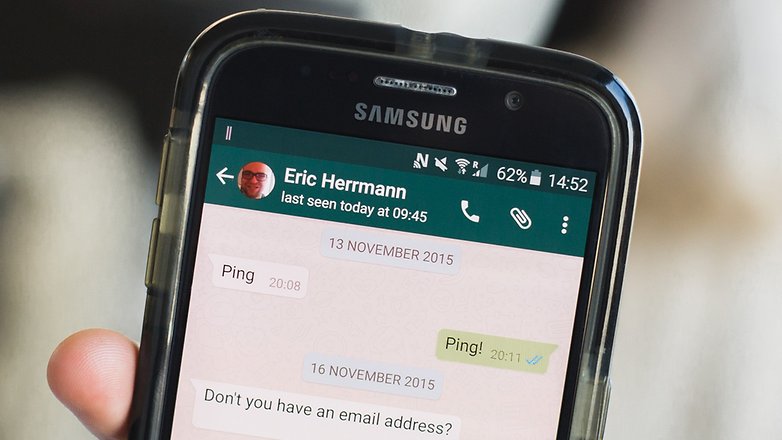
The first check mark means that your message has been sent. When the second one appears, your message has been received by the recipient's phone. This doesn’t mean that the person has read your message, just that it is on their phone; when those check marks turn blue, that's when they have seen the message. If you see the check marks turn blue, they haven't blocked you, and everything is fine. Take a deep breath.
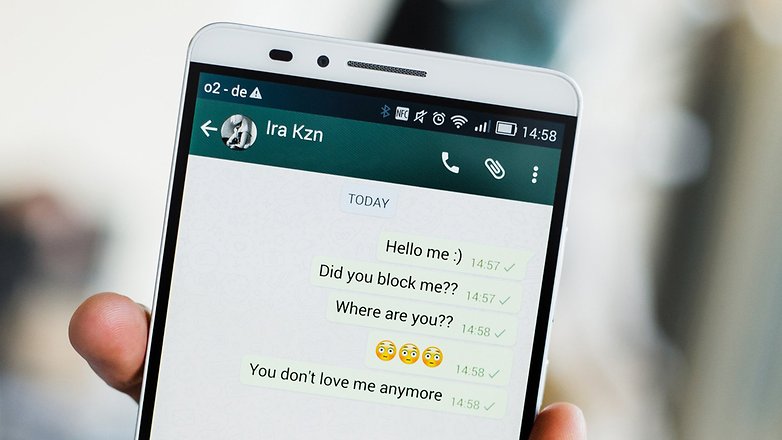
If your messages never get beyond that single, sad gray tick, you might have been blocked.
There's a vague chance they still love you, though, surely? Time to keep digging.
Again, maybe their phone is broken, maybe they've changed their number, etc, etc, but if this one is true and the two signs above it are, too – well, thing's aren't looking good, are they?
Let's go a step further and check from a different account, meaning from a mutual friend’s smartphone. If you see here that your estranged friend's profile information and picture have changed, then we're sorry to break it you, but your friend has blocked you and, given how strangely you've been acting, with good reason.
Rather than just leave the chat, which may offend some people, you can simply mute the chat so you stop receiving notifications from it.

If so, then you can create a shortcut icon to those conversations, which will appear on your Android home screen. This means you can jump straight into chats with your BFFs and important groups.
Unfortunately, Android 5.0 Lollipop killed lock screen widgets and replaced them with heads up notifications that also work on the lock screen.
WhatsApp needs no introduction. It's the world's most popular instant messaging service, and we love it. As a show of appreciation for WhatsApp, we've decided to chalk up a list of WhatsApp tips and tricks to help AndroidPIT readers get the most out of it.
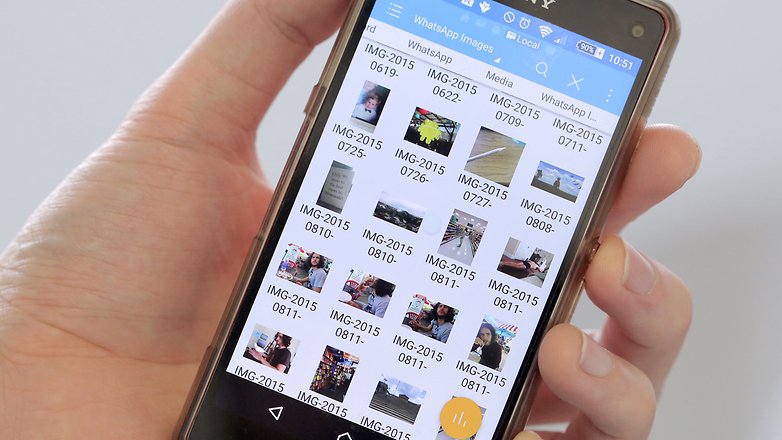
1. Stop WhatsApp images appearing in your camera roll
If your friends send you loads of stupid pictures on WhatsApp, and you don't want them mixed in with all your amazing photos, it is possible to keep WhatsApp images separate so they don't appear in your camera roll.- Download a file explorer, such as ES File Explorer
- Navigate to sdcard/WhatsApp/Media
- Enter the folder you don't want shared (in this case, WhatsApp Images)
- Tap the plus button at the bottom of the screen
- Name the new folder .nomedia
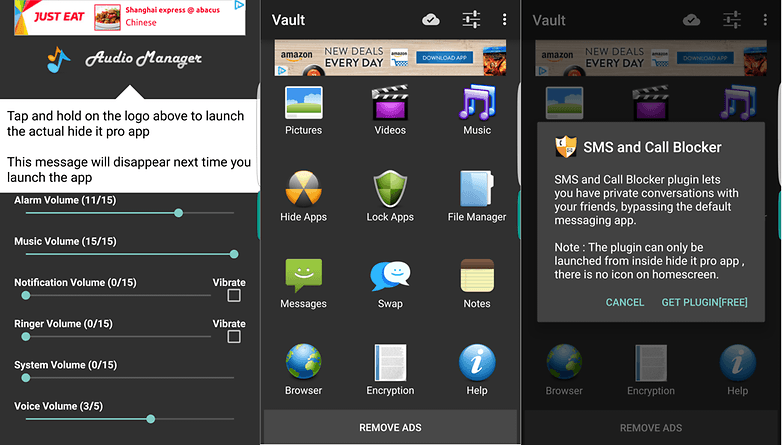
2. Lock WhatsApp
If you're keen to keep your WhatsApp private, you can use any number of security apps to set a passcode for the app. AppLock is a popular choice.3. Disable media auto-download
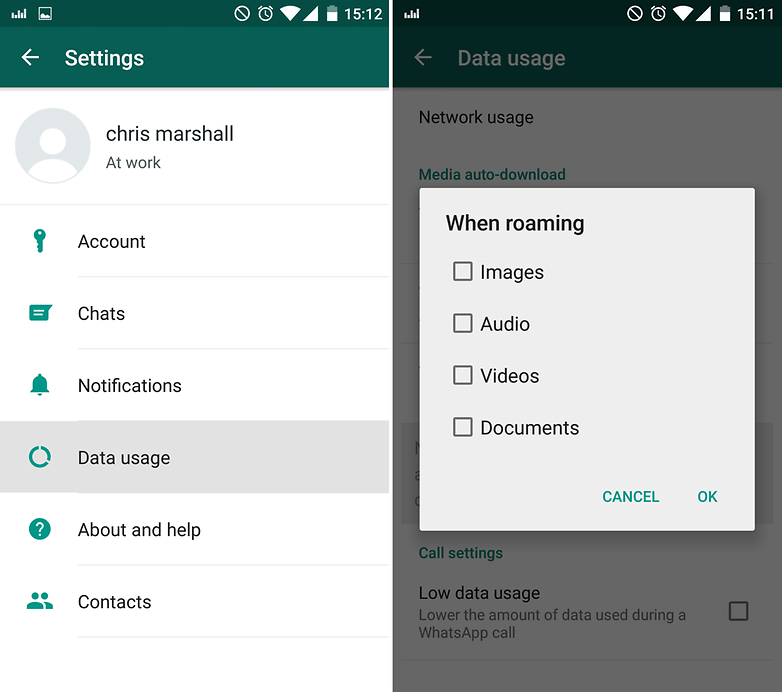
If you're running low on mobile data, it might be worth turning of the automatic download of media in WhatsApp, at least until you hit the monthly reset.To do this, head to Settings > Data usage. In this menu, ensure you untick the boxes in both When using mobile data and When roaming
4. Switch your WhatsApp chat history between phones
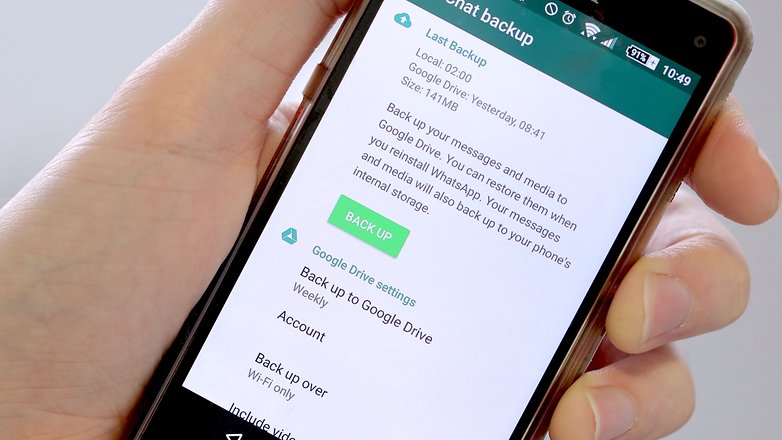
An update that allows Google Drive backups should now have rolled out to all users. This is far and away the easiest method of moving your chat and media history between devices.However, if for any reason you need to move your WhatsApp history over to a new device without using Google Drive, it's still a pretty painless procedure. All you need is a microSD card and a few minutes to spare.
- Insert the microSD card into the device that has WhatsApp on it
- In WhatsApp, go to Settings > Chats > Chat backup
- Remove the SD card and place it into your other device
- Install WhatsApp on the other device
- WhatsApp should detect the backup and prompt you to restore it, which you should do
5. How to get WhatsApp on your tablet
If you're looking to get the WhatsApp experience on a larger screen, you can follow our useful guide on how to get WhatsApp on tablet.6. How to get WhatsApp on your PC
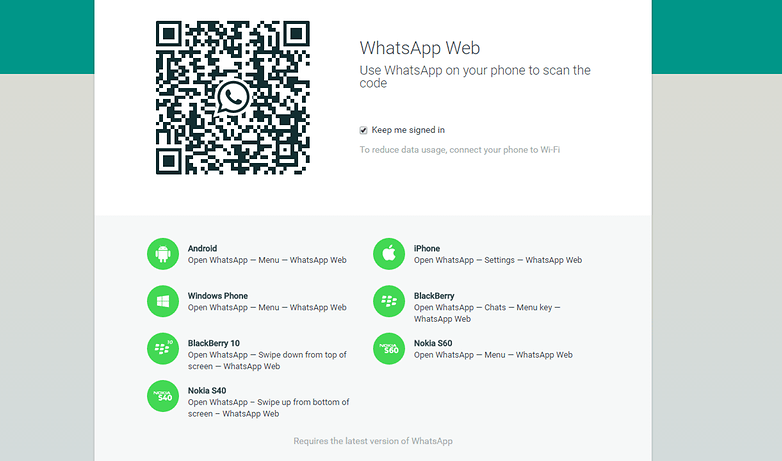
By far the most convenient way to get WhatsApp access on your PC is to simply use the official web client. Open it up, and then you will be prompted to scan a QR code. To do this, open WhatsApp on your smartphone, hit the trio of dots in the upper-right corner, and select WhatsApp Web.The WhatsApp web client acts as a mirror of your device, meaning you will only receive messages so long as your smartphone is switched on and connected to the internet.
7. Download and install the latest WhatsApp APK
First, head to Settings > Security > Unknown sources and ensure the box is checked.The, on your smartphone browser either head to the WhatsApp website or APK Mirror and download the latest APK (APK Mirror is usually ahead of the WhatsApp website). Once the file's downloaded, open it to install the latest WhatsApp APK.
8. How to make WhatsApp video calls
The addition of voice calls to WhatsApp is highly anticipated and looks likely to arrive very, very soon. You can follow our updates on this and alternative solutions you can try in the meantime here:9. Use WhatsApp on two devices at once
You can easily use WhatsApp without a SIM card or on two devices at the same time simply by using the web client. But this means you have to remain connected to the internet on your primary device, and connection issues are not uncommon.The second method is more laborious but also better in the long run.
To do this, both the devices you want to use will need to be rooted. Download and install Titanium Backup root and use it to perform a full backup of WhatsApp, including root permissions. Once this is done, use a file manager to navigate to the folder that Titanium Backup created containing the three files starting with com.whatsapp. Copy this folder onto the internal memory of your second device.
Now, on the second device, where you just copied the files to, download and install WhatsApp. Do not open WhatsApp yet. First, download and install Titanium Backup root again. Open Titanium Backup and grant it root permission. Close the warning and select Backup / restore. Restore using the WhatsApp folder that you copied to the device earlier.
Your second device is now set up with a clone of the original app, so it is already verified. The only downside is that only one of the devices will receive notifications, the one from which you sent the last message.
10. Get desktop notifications for WhatsApp chats
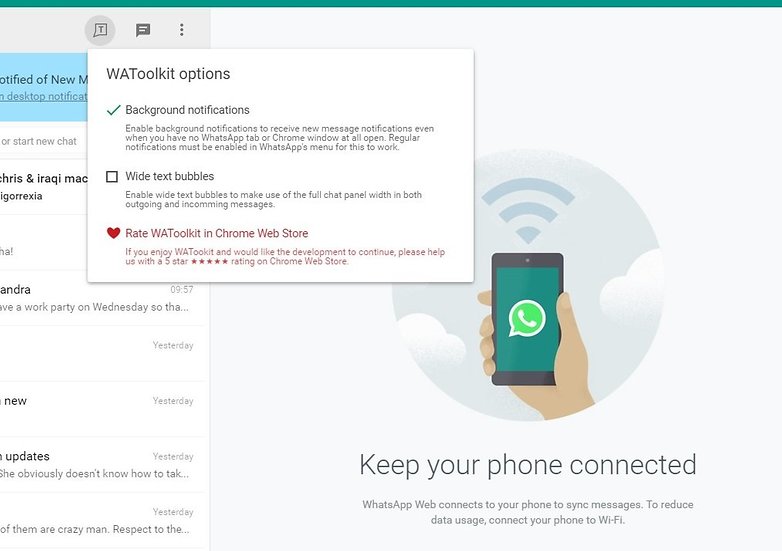
You'll need the WhatsApp Web Chrome extension to get WhatsApp desktop notifications. Then, all you need to do is install a simple add-on called WAToolkit.After installing it, you will see a new icon in your browser toolbar. Hover your cursor over it to see the most recently received message, or right click for more options. You'll also notice the WAToolkit options button in your WhatsApp Web tab. The best part? WAToolkit will notify you of messages on your desktop even when Chrome itself isn’t running.
- Install WhatsApp Web on PC
- In the WhatsApp Web browser window, go to Options > Notifications and ensure that Desktop Alerts is ticked
- Install the Chrome browser extension WAToolkit
- Make sure the background notifications box is ticked, like in the image below
11. Recover deleted WhatsApp messages
By default, WhatsApp backs up your messages every day at 4am. This means that if you've deleted any messages since then, but before the next auto-backup, you can recover them. To do this:- Uninstall WhatsApp from your device (Settings > Apps > WhatsApp > Uninstall)
- Reinstall WhatsApp.
- Type your phone number into WhatsApp, then it should notify you that it's found a backup of your chats
- Tap Restore to get your deleted messages back
12. Hide 'Last seen', profile photo and status
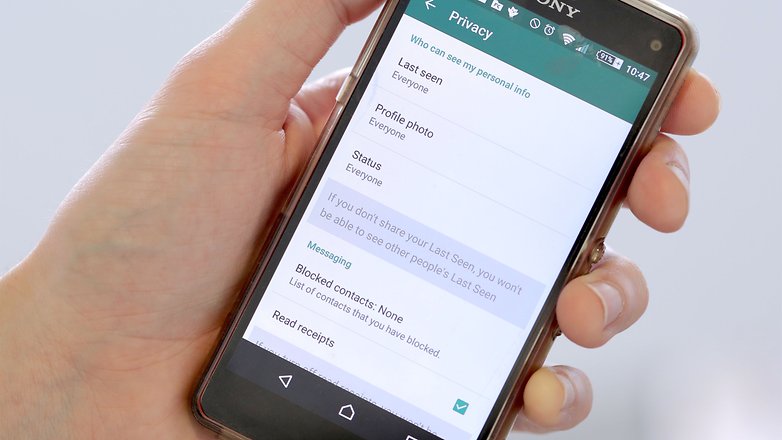
Getting thrown into a big group chat filled with party guests and people you don't know can be bewildering. Suddenly, your profile picture is staring back at a chatroom full of strangers, who can also see your status and when you're reading messages. If I wanted a whole flock of strangers ogling and judging a photo of me, I'd have gone on Tinder.Here's how to have better control over who sees this information on WhatsApp:
- Tap the Options icon at the top right of WhatsApp
- Go to Settings > Account > Privacy
- Go through the Last seen, Profile photo, and Status options, then set their visibility to 'Everyone', 'My contacts' or 'Nobody', depending on how much privacy you want
13. Know when you've been blocked
There are four ways to suss out whether someone has blocked you on WhatsApp. Each sign is largely meaningless by itself, but together they form a solid reason to believe that your friend doesn't want to be your friend.Take note that WhatsApp has deliberately made it difficult to tell whether someone has blocked you or not, in order to maintain users' privacy. There's always an outlying chance that you're just being paranoid, even when all four of the below points apply.
Check the 'last seen' time
A contact's 'last seen' time appears in the top bar right under their name. If there's no information about when they were last online, this could be a bad sign. It doesn't necessarily mean that they've blocked you – it is possible to stop this information appearing without blocking someone. Your friend might just value their privacy, so don't go burning bridges just yet. Read on.Check the double check
Check marks are WhatsApp's way of compounding your obsessive streak by ensuring that you know what's going on on the other end of the line.The first check mark means that your message has been sent. When the second one appears, your message has been received by the recipient's phone. This doesn’t mean that the person has read your message, just that it is on their phone; when those check marks turn blue, that's when they have seen the message. If you see the check marks turn blue, they haven't blocked you, and everything is fine. Take a deep breath.
If your messages never get beyond that single, sad gray tick, you might have been blocked.
There's a vague chance they still love you, though, surely? Time to keep digging.
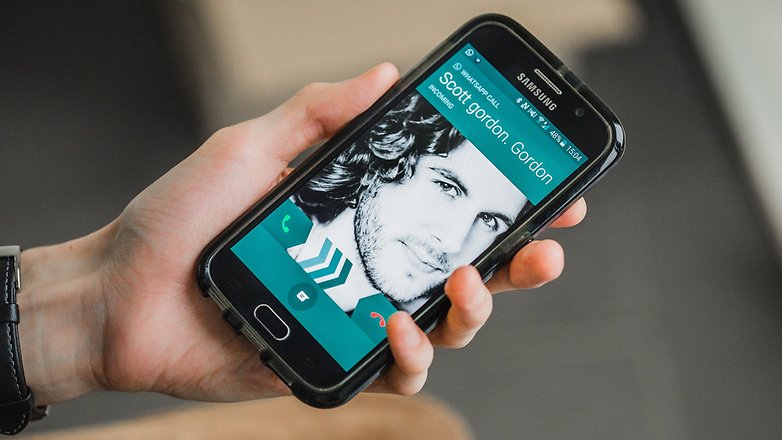
Do your calls go through?
Another indicator that your friend hates you is that all those desperate WhatsApp calls you make never go through.Again, maybe their phone is broken, maybe they've changed their number, etc, etc, but if this one is true and the two signs above it are, too – well, thing's aren't looking good, are they?
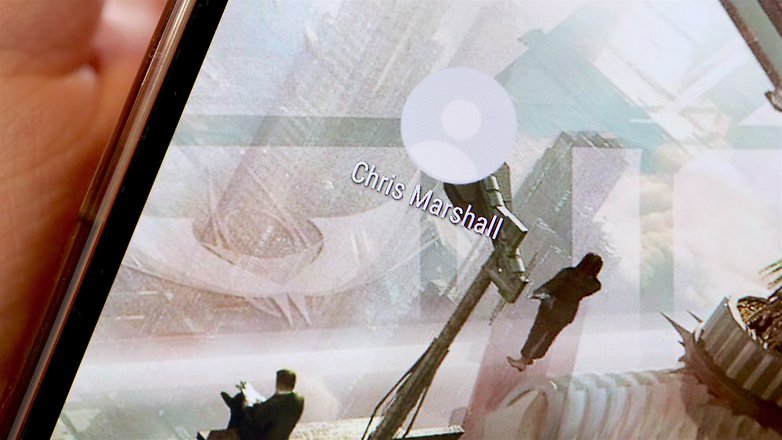
Has their picture or profile changed?
If you notice that a contact hasn’t updated or changed their profile in a while, or they've had the same picture for months, this could mean that they’ve blocked you. Or that they just never update their profile. Maybe everything is fine.Let's go a step further and check from a different account, meaning from a mutual friend’s smartphone. If you see here that your estranged friend's profile information and picture have changed, then we're sorry to break it you, but your friend has blocked you and, given how strangely you've been acting, with good reason.
Bonus method: Ask them
The final, and ultimate, way of knowing is to ask them. If they say yes, then they have blocked you. If they make up a terrible excuse, they have blocked you. But if the reason why they never respond to you seems plausible and they invite you to hang out, everything is OK. For now.14. Mute annoying WhatsApp group chats
We've all been in that position where we've somehow been dragged into a group chat that we either didn't really want to be in in the first place or just don't want to receive notifications from every couple of minutes.Rather than just leave the chat, which may offend some people, you can simply mute the chat so you stop receiving notifications from it.
- In WhatsApp, tap the Chats tab
- Tap the group you want to mute
- With the group open, tap the Options icon at the top right
- Tap Mute, then select the amount of time you want to mute the group for. You can also untick the Show notifications box so that you never hear from the group again until you decide otherwise
15. Create a home screen shortcut for your favorite chats
Do you have certain friends with whom you have constant stream-of-consciousness conversations, where you're non-stop WhatsApp'ing all day, every day?If so, then you can create a shortcut icon to those conversations, which will appear on your Android home screen. This means you can jump straight into chats with your BFFs and important groups.
- In WhatsApp, tap the Chats tab.
- Tap and hold the conversation you want to create a shortcut for.
- When the list of options appears, tap Add conversation shortcut
- A shortcut displaying your contact's profile picture will now appear on your home screen. Tap it to jump straight in and start chatting to them.
16. Add a widget to your lock screen
WhatsApp widget on stock Android
If your device is running Android 4.2-4.4 KitKat or a custom ROM that supports lock screen widgets, you can quickly and easily add a custom WhatsApp widget to your lock screen.Unfortunately, Android 5.0 Lollipop killed lock screen widgets and replaced them with heads up notifications that also work on the lock screen.