How to get Android 6.0 Marshmallow on All Android Mobiles
For the Samsung Galaxy , you can update the operating system to Android 6.0 Marshmallow. In this article, we’ll let you into the secret of how to do this.
Preparation steps
Thanks to a whole range of alternative firmware, you can still upgrade your Samsung Galaxy S4 with software updates that Samsung no longer supplies. However, please note that doing so will mean exclusion from your guarantee and you will do so at your own risk.First of all, you will need the Samsung driver for Windows PC, Odin 3.10.7 and Heimdall. After downloading these, you need to install the Samsung driver. Linux and Mac users can skip this step. Next, you need to unpack Heimdall and open its directory.
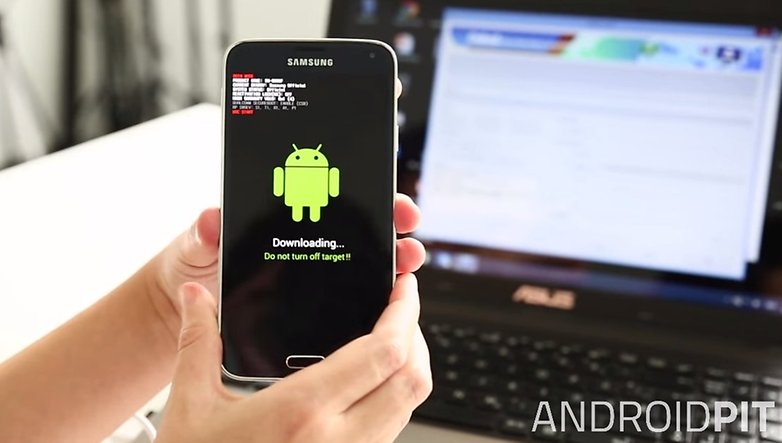
Turn your Galaxy S4 on in download mode. To do this, turn the phone off and when you switch it back on again, press and hold the volume down, home and power buttons simultaneously. Next, press the volume up button to confirm that you wish to enter download mode.
Check whether your computer can communicate with Heimdall. Open the Heimdall front end, go into the Rider Utilities and click on Detect. When the detected output device appears, you can continue. If problems arise here, you might have to switch to the ADB Driver Installer and follow the given prompts.

Installing Recovery
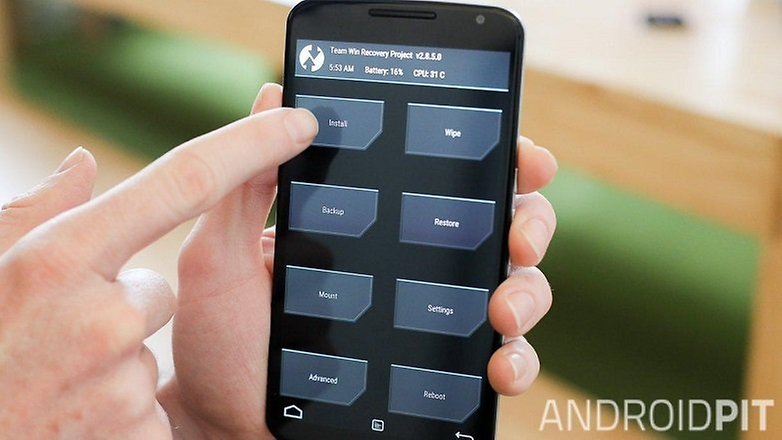
The next step is to change over Recovery. This system allows you to interact with the partitions of your smartphone. This is essential in order to change the firmware and install system apps such as Google Apps.Download the latest .img file of TeamWin Recovery Project (TWRP Recovery). This Recovery version has the best support. Now go to the display. Move the file to the Heimdall directory. Right click in the folder window and open up the command prompt. Type the following in:
heimdall flash –RECOVERY recovery.img –no-reboot
Instead of recovery.img, type tw and then press the tab key. The corresponding name of your recovery file should then be automatically completed. If you get the message: libusb error: -12, you must also replace the Samsung USB driver. To do so, open the device manager in Windows, search for other devices and uninstall the MSM8960 driver. Unplug the USB from the phone, install the driver and plug the cable back in again. Then repeat the steps for Flash. If successful, you must reboot the Galaxy S4 in Recovery mode. Hold down the power and home and volume down buttons to do this.

Download and install firmware
After installing Recovery, we can finally begin the main part of the process and install Marshmallow on your Galaxy S4. You can find the corresponding firmware on the CyanogenMod download page. In the column CyanogenMod Build, you can get ZIP files with the so-called Snapshots of CM 12.1 or Nightly Builds of CM 13. The former are based on Android 5.1 Lollipop and are less up-to-date but therefore stable. The latter are based on Android 6.0 Marshmallow and are updated almost daily but not yet fully developed. Choose which one you want and download the ZIP file.If you don’t want to miss out on using the Play Store as your App source, you will need an extra ZIP file that contains Google-Apps. The easiest place to get this is Opengapps.org. Download the ARM variant for your Android version. We recommend the Micro Package for a better calendar and Gmail.
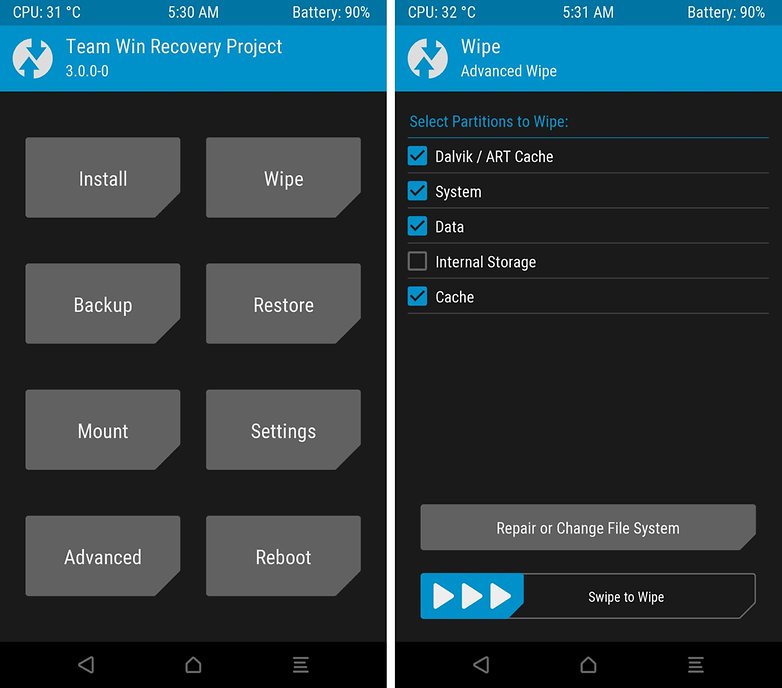
Copy the ZIP file to your Galaxy S4. Change in TWRP Recovery to Wipe and then to Advanced Wipe. There, select Partition Data and System in order to delete the Samsung Android version from your Galaxy S4. Your App settings will be lost but your files and photos will be untouched.

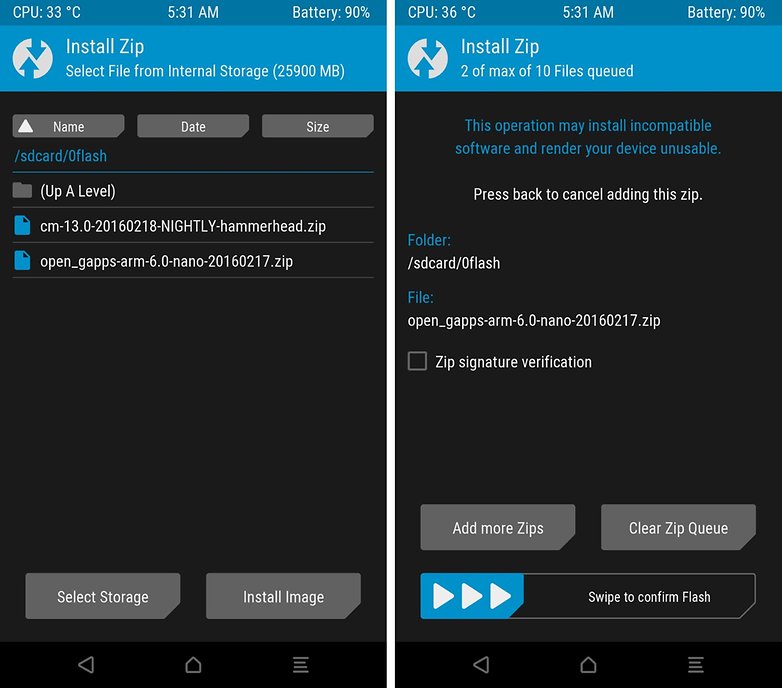
Next, go into the TWRP Recovery startup screen and click on Install. Go to the directory with CyanogenMod and select Per Select ZIP. With Per Add more ZIPs, you can install the Google Apps afterwards. Swipe the lower edge to start the Flash process. The contents of the ZIP file will then be unzipped in the previously emptied partition.

After the flash process, you will see the suggestion: Wipe Cache/Dalvik. Click on this in order to avoid errors in the startup process. The system will reboot itself. The first time it restarts can take a while, so you'll need to be patient
No comments:
Post a Comment